

Cabinet door hinges may be small, but they play a big role in how your kitchen looks and functions. Whether you’re upgrading your kitchen cabinets, switching to soft close cabinet door hinges, or replacing broken hardware, knowing how to replace cabinet door hinges is a helpful skill for any homeowner or DIYer.
Over time, hinges can wear down, loosen, or become outdated. Swapping them out with a new set can improve cabinet performance and give your kitchen a refreshed look—without replacing the doors themselves. This guide will walk you through the entire process, from choosing the right cabinet door hinge type to removing the old hardware and installing the new hinges.
We’ll also answer common questions, like how to adjust a cabinet door hinge and what to know when working with inset cabinet door hinges or other specialty styles. If you’re looking to install or upgrade kitchen cabinet door hinges, you’re in the right place.
Types of Cabinet Door Hinges
When you replace cabinet door hinges, one of the most important first steps is knowing which type of hinge you’re working with—or want to upgrade to. The style of hinge you choose affects how your cabinet doors function, how they look when closed, and how easy they are to install or adjust.
Below are the most common types of cabinet door hinges, each with its own pros and use cases.
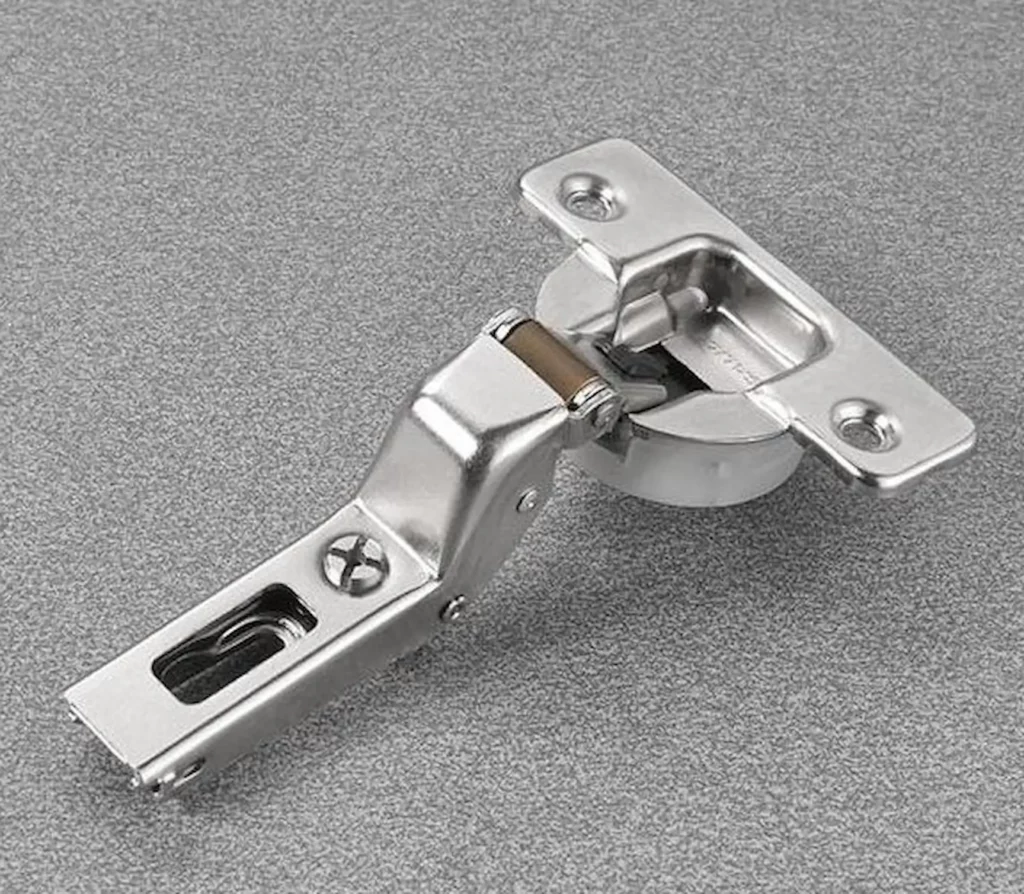
1. Concealed Hinges (Hidden Hinges)
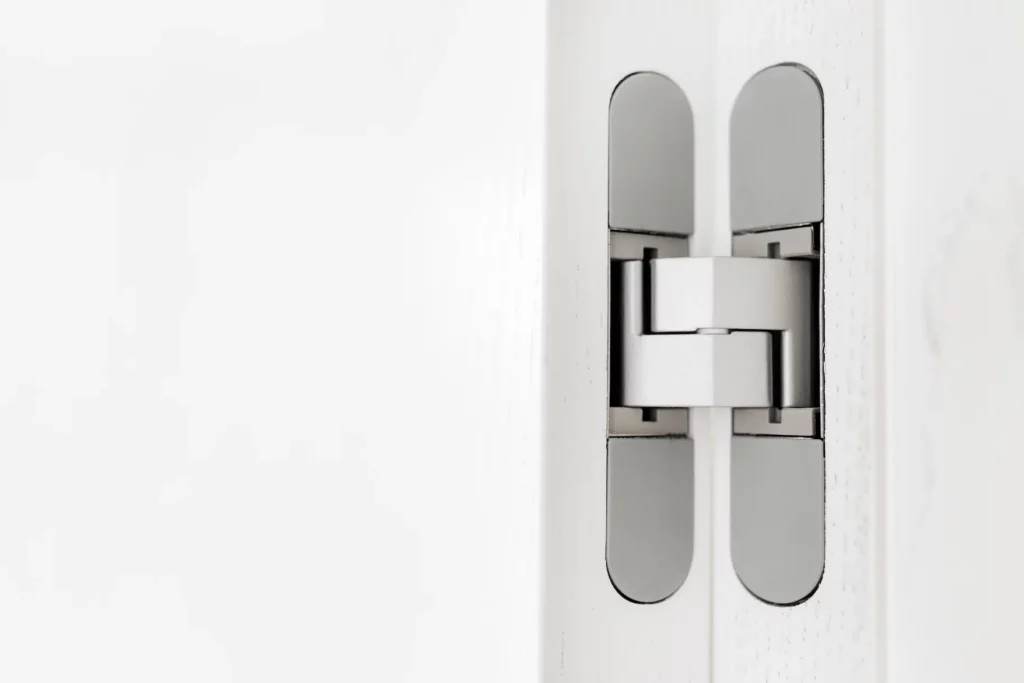
These hinges are completely hidden when the door is closed, creating a clean, modern look. The hardware is installed on the inside of the cabinet box and door, making them a popular choice for kitchen cabinet door hinges.
They’re also frequently used for soft close cabinet door hinges, and many allow for easy adjustments.
Best for: Modern kitchens and homeowners who want a seamless, hardware-free look.
2. Semi-Concealed Hinges
Semi-concealed hinges show just a small part of the hinge when the door is closed. Most of the hardware remains hidden, but a small section is visible near the door joint—often as a decorative accent.
You’ll commonly find these on face frame cabinets, and they come in different finishes to match your kitchen hardware.
Best for: Decorative or transitional styles that benefit from a small visual detail.
3. Exposed Hinges
As the name implies, exposed hinges sit entirely on the outside of the cabinet. They’re always visible, so the style, finish, and shape become part of your kitchen’s design.
These hinges are less adjustable than concealed styles, but they’re often easier to install if you’re replacing like-for-like.
Best for: Traditional, farmhouse, or vintage kitchen designs.
4. Surface Mount Hinges
Surface mount hinges sit on top of the cabinet door and frame, rather than being recessed inside. They’re easier to install and often used in older or utility-style cabinets.
Since they’re more visible, they can stand out more than other hinge types.
Best for: Simple upgrades or when replacing older-style cabinet doors.
5. Inset-Mount Hinges

Inset hinges are recessed into the cabinet door and frame, creating a flush, built-in look. This design makes them more durable and ideal for heavier cabinet doors, but they require precise installation and can be harder to replace.
Best for: Custom cabinetry and heavier door applications where durability is important.
For more information on Inset Cabinet Doors, check out our guide on the Pros and Cons of Inset Cabinet Hinges!
6. Soft Close Hinges
Soft close hinges are available in many of the styles above—especially concealed and inset hinges. These hinges contain a dampening mechanism that gently closes the door, reducing slamming and wear over time.
Best for: Busy kitchens or anyone looking for a quieter, smoother door experience.
Tools & Materials Needed
Before you start replacing your cabinet door hinges, it’s important to gather the right tools. Having everything on hand will make the process smoother and help ensure accurate installation—especially if you’re working with soft close or inset cabinet door hinges that require precise alignment.
Here’s what you’ll need:
- Phillips Head Screwdriver or drill – Most cabinet hinges are attached with standard screws. A power drill with a screwdriver bit will save time, but a manual screwdriver works too.
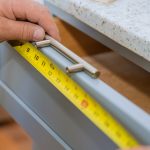
- Tape measure – For measuring hinge placement and cabinet door spacing.
- Pencil – For marking hole positions or hinge outlines.
- Level – To make sure your doors are straight after reinstallation.
- Clamps (optional) – Useful for holding the door steady while mounting hinges, especially for solo DIYers.
Once you’ve gathered your tools, you’re ready to start removing the old hardware. In the next section, we’ll walk through how to remove your existing cabinet door hinges safely and cleanly.
How to Remove Old Cabinet Hinges
Before installing your new hinges, you’ll need to remove the existing ones. Whether you’re replacing old, worn hardware or upgrading to soft close cabinet door hinges, careful removal will help preserve the cabinet doors and frame for reuse.
Here’s how to safely remove cabinet door hinges:
- Open the Cabinet Door Fully – Make sure the door is fully open so you have clear access to both the screws on the door and the cabinet frame. This also prevents the door from shifting as you work.
- Unscrew the Hinge from the Cabinet Frame – Start by removing the screws that attach the hinge to the inside of the cabinet frame or side wall. Hold the door steady with one hand while you work, or have someone assist you to prevent it from sagging.
- Unscrew the Hinge from the Cabinet Door – Once the frame side is detached, unscrew the hinge from the door itself. Be careful not to strip the screws, especially if they’ve been in place for years.
- Remove Any Debris or Residue – After removing the hinges, inspect the screw holes and surface area. Wipe away dust, and if any wood is splintered or cracked, make a note in case you need to fill or adjust the holes when installing new hinges.
Once the old hinges are removed and the cabinet surface is clean, you’re ready to begin the installation process. In the next section, we’ll walk you through how to install your new cabinet door hinges, including positioning tips and best practices.
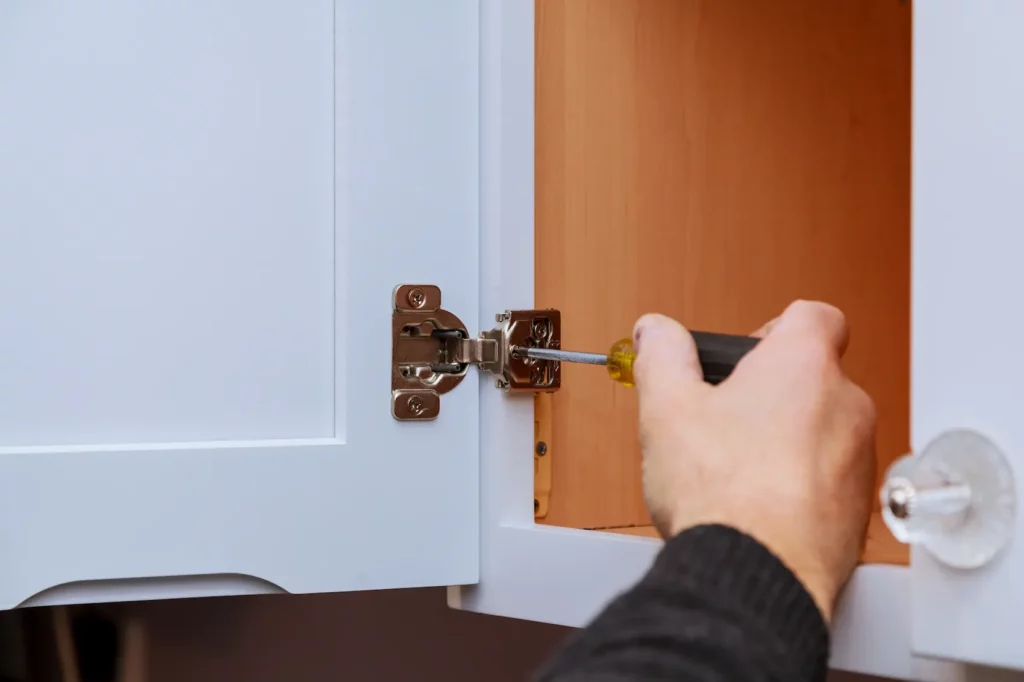
How to Install Cabinet Door Hinges
Now that your old hinges are removed, it’s time to install the new ones. Whether you’re working with inset, soft close, or concealed cabinet door hinges, proper positioning is key to getting smooth operation and a professional finish.
Follow these steps for a clean, accurate install:
- Position the Hinge on the Door – Hold your new hinge in place on the back side of the cabinet door. Most hinges will have a circular cup that fits into a pre-bored hole.
- Mark and Drill Pilot Holes – Use a pencil to mark where the screws will go, then drill small pilot holes. This prevents the wood from splitting and keeps your screws aligned. This step is especially important when working with inlay cabinet door hinges or any hinges that require precise fitment.
- Attach the Hinge to the Door – Secure the hinge to the door using the provided screws. Make sure it sits flush with the surface and is firmly attached. Repeat the process for any additional hinges on the door.
- Attach the Door to the Cabinet Frame – Line up the door with the cabinet frame, and attach the hinge plate to the inside of the cabinet. Most modern hidden cabinet door hinges have adjustable screws to help align the door after it’s attached.
- Check the Alignment – Once both hinges are installed, slowly open and close the door to check movement. The door should open smoothly and sit flush with the cabinet frame when closed. Minor adjustments can be made in the next step if needed.
Installing kitchen cabinet door hinges may seem intimidating at first, but with the right tools and steps, it’s a manageable project for most DIYers. Now that your hinges are installed, let’s go over how to fine-tune their position.
For a comprehensive understanding of hinge boring choices and their impact on installation, refer to our Cabinet Hinge Boring Options guide.
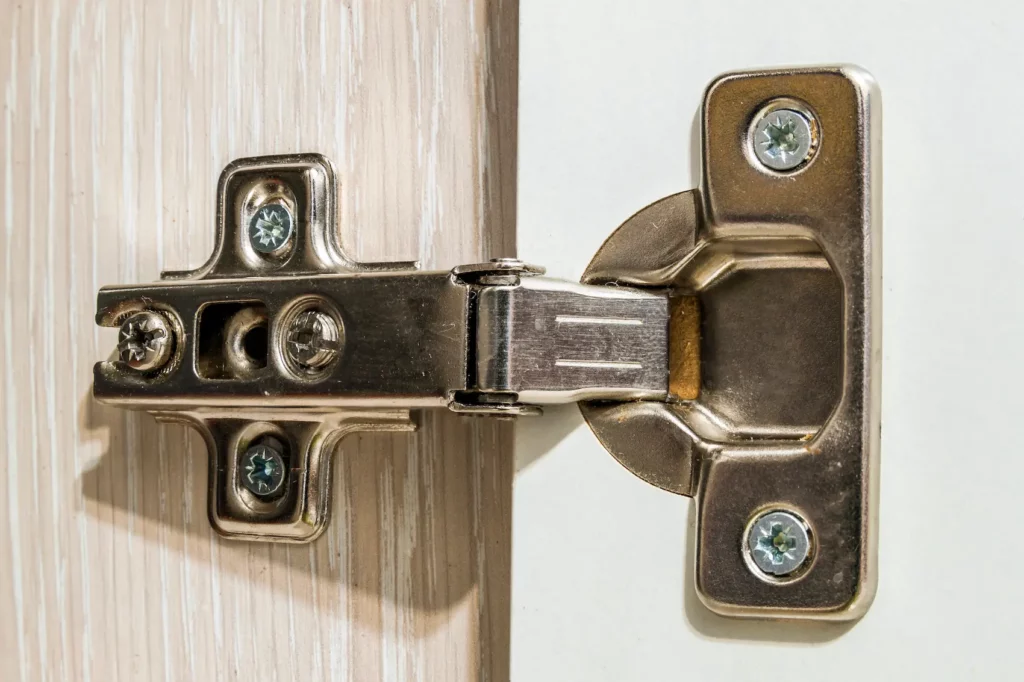
How to Adjust Hinges on a Cabinet Door
Even with precise installation, it’s common to find that a cabinet door sits slightly uneven or doesn’t close quite right. Fortunately, most modern cabinet door hinges—especially concealed and soft close styles—are designed with built-in adjustability. With just a screwdriver, you can fine-tune the alignment to ensure your doors sit flush, open smoothly, and maintain a clean, uniform look across your cabinets.
There are three main directions you can adjust: side-to-side, in-and-out (depth), and up-and-down (height). The screw closest to the cabinet door typically controls the horizontal position, allowing you to move the door left or right. This is especially useful for lining up doors that sit next to each other or closing small gaps between the door and cabinet edge.
The rear screw adjusts how far the door sits from the cabinet box, moving it closer in or slightly out. If your cabinet door isn’t sitting flush when closed or rubs against the frame, this is the adjustment to focus on. Some inset cabinet door hinges may be more sensitive to this depth setting due to tighter clearances.
Finally, if your door appears too high or low compared to others, you may need to adjust the hinge vertically. On many hinges, this means loosening the mounting screws slightly and shifting the entire hinge plate up or down within its slot before tightening everything back in place.
After making adjustments, it’s a good idea to double-check all screws to ensure everything is snug. Proper hinge alignment not only improves appearance but also helps prevent long-term wear on your cabinet doors and hinges.
Common Mistakes to Avoid
To successfully replace cabinet door hinges, it’s important to avoid a few common missteps that can lead to frustrating results. Here are some of the most common mistakes homeowners make—and how to avoid them:
- Not measuring hinge overlay correctly – If you don’t account for how much the door overlays the cabinet frame, the new hinge may not line up properly. Always confirm the overlay measurement before ordering.
- Using the wrong hinge type – Swapping a concealed hinge for an exposed one (or vice versa) can change how the door mounts and moves. Stick with the same cabinet door hinge type unless you’re also modifying the door or frame.
- Skipping pilot holes – Driving screws directly into the wood without pre-drilling can split the material, especially on the edge of cabinet doors.
- Improper alignment – Hinges that are off by even a few millimeters can lead to crooked doors or improper closing. Use a level and take your time during installation.
Frequently Asked Questions
When planning to replace cabinet door hinges, start by checking the current hinge style on your cabinets. Is it fully hidden when the door is closed (concealed), partially visible (semi-concealed), or fully visible (exposed)? Also consider whether your cabinet doors are overlay, inset, or inlay, as this affects hinge compatibility. Matching the new hinges to your cabinet style and door function is key to a successful replacement.
Yes! In most cases, you can replace standard concealed hinges with soft close cabinet door hinges of the same size and overlay type. Just make sure the new hinges are compatible with your cabinet configuration, especially for inset or frameless styles.
If your door doesn’t have pre-drilled hinge cups, you’ll need to measure and bore the holes. Mark your measurements carefully, drill pilot holes, and install the hinge just as you would during a replacement. Many hinge manufacturers provide templates to simplify the process.
You can, but it’s best to keep things consistent for a uniform appearance and function. For example, mixing soft close with standard hinges might make some doors behave differently. If you’re changing styles, consider updating all hinges within a cabinet section for a cleaner look.