Choosing the Right Boring Options for Cabinet Hinges
When upgrading your kitchen cabinets, achieving a sleek, modern look often comes down to not only the type of hinge, but also the hinge boring options you choose. Whether you’re installing concealed hinges for a seamless appearance or selecting overlay hinges for a more traditional style, understanding your bore options ensures the perfect fit for your cabinet doors.
The challenge? The process of choosing the right hinges for this look tends to be a little bit boring. Pun intended. With so many hinge boring patterns available, picking the right one can feel overwhelming. But don’t worry—this guide will break down the different bored hole placements, cup and dowel options, and hinge hole configurations to help you make the best choice.
For a “hinge-less” or a flush cabinet door design, bored holes that are about 1/2 inches deep are used to install concealed hinges, keeping the hardware hidden while allowing smooth opening and closing. If a more classic style is what you’re after, face frame cabinets paired with overlay hinges can provide a stylish, functional solution.
Before diving into specific boring placements and style hinges, let’s first explore the fundamentals of hinge boring and how it affects the function and aesthetics of your cabinet doors.
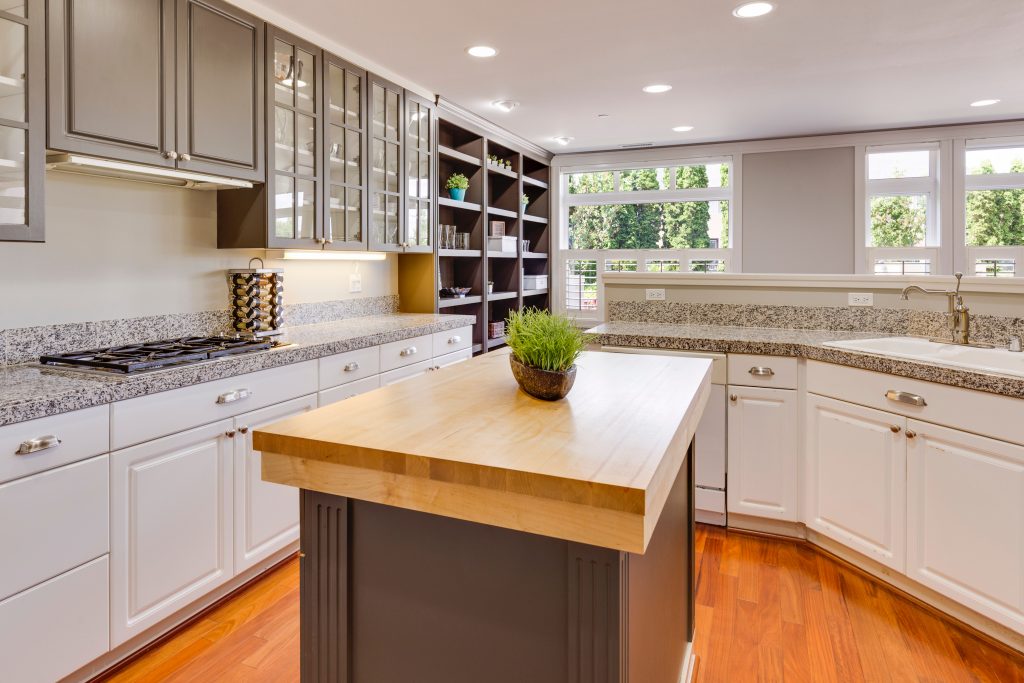
When you think of a cabinet hinge, you are likely picturing a standard overlay hinge, which could be a great option. However, if a seamless cabinet door design with no exposed hinges is your goal, you would want to go with a concealed hinge with a bored hole. This is a modern option and keeps hardware hidden. After reviewing the image below for an example of concealed hinges, we’ll discuss how to correctly choose boring options.
Understanding Boring Patterns
When researching hinge options, you may come across terms like “cup only” or “cup and dowel”, which can be confusing at first. These terms describe how cabinet hinges attach to the cabinet door and whether additional holes are required for secure installation.
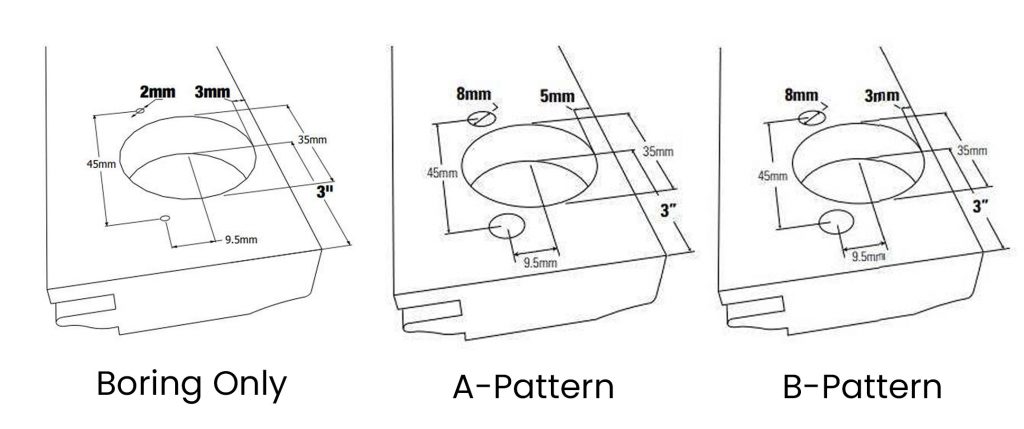
So, what do these terms actually mean? Well, Cup Only is a pre-bored hole which is used for screw on style hinges, the hinge is attached to the door with wood screws. Cup and Dowel is for press in style hinges, there will be one hole for the cup of the hinge, and two smaller holes which you will insert the pre-attached dowels.
A boring pattern then refers to the size and spacing of the holes drilled. The pattern used when boring cabinet doors for hinges is dependent on the boring/hinge option you select when choosing your doors. On all options, doors under 40 inches in height will have two holes. For doors 40 inches or taller, there will be a third hole bored, directly in the middle. Let’s talk through your Boring and Hinge options now:
Option 1: No Boring
This option means the cabinet door is left without any pre-drilled hinge holes, allowing complete flexibility in hinge placement.
Option 2: Boring Only
If you already have hinges or plan to purchase them separately, this option ensures the necessary holes are pre-drilled in a standard U-shaped pattern, making installation easier.
Option 3: Salice Standard Compact Hinge & Salice Excentra Soft-Close
This option follows the B-Pattern boring layout. A 35mm hinge cup is drilled 3 inches from the top or bottom of the door and 3mm from the edge. There are two 8mm holes are drilled on each side of the main hinge hole, allowing for dowel insertion. When you choose this option the hinges are included.
Option 4: Salice 120 Degree & Salice 105 Degree Soft-Close
This option is drilled following the A-Pattern boring layout. The 35mm cup hole is positioned 3 inches from the top or bottom and 5mm from the edge. Like the B-Pattern, two 8mm holes are drilled around the main bored hole for secure dowel placement.
Option 5: Lazy Susan Boring & Hinge Set
This option is designed for corner Lazy Susan cabinets, it includes hinge boring only on one door while the second door remains unbored. The door with the boring holes will have two holes on the left of the door and two on the right of it. One set will be used to attach to your cabinet base and the other set will be used to attach your second door. When you choose this option the hinges are included.
Need more guidance on Lazy Susan Cabinet Doors and how to measure them? Check out our detailed guide!
Installing Cabinet Doors with Pre-Drilled Holes
Every good project features at least a little bit of visualization. In this case, it would be important to seriously ponder the way in which these cabinet doors will function. Knowing key details like which direction the door will open will be crucial to the location of the boring holes. And how these doors open, of course, depends largely on where they are being placed inside your home.
If you are looking at the front of the door, imagine how you will be opening it. When the door swings to the left, the holes will be bored on the left side. The hinge should be inserted and installed so that the arm extends to the left. When the door swings to the right, the holes will be bored on the right side. The hinge should be inserted and installed so that the arm extends to the right.
We hope you found this helpful! If you need assistance with choosing please give us a call, we are happy to help!


